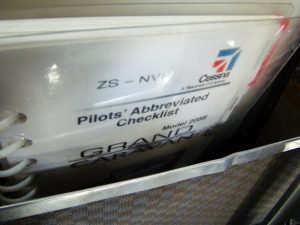
Before you ever take off, the single most important step you can take as a student pilot is a thorough daily aircraft inspection—also known as the pre-flight inspection. Whether you’re flying a Cessna 172, Piper Archer, or Diamond DA40, skipping this step is never an option.
✅ Quick Tip: Download our printable student pilot pre-flight checklist PDF and carry it in your kneeboard or flight bag.
In this detailed guide, we’ll break down everything you need to know to confidently inspect your aircraft each day—just like your instructor and the FAA expect you to.
Table of Contents
Why Pre-Flight Inspections Matter
Every flight starts on the ground. And a missed cracked tire, oil leak, or faulty control surface could lead to dangerous consequences in the air.
As a student pilot, the daily inspection is your safety net—your chance to ensure the aircraft is airworthy and safe for flight.
It also helps you:
-
Learn the aircraft systems intimately
-
Build good habits for future checkrides
-
Spot early signs of wear and tear
-
Prevent costly damage or emergencies
🛬 Accidents often stem from poor pre-flights—don’t let yours be one of them.
FAA Requirements for Pre-Flight Checks
According to FAR §91.103, the pilot in command (PIC) is responsible for ensuring the aircraft is in safe operating condition.
You must check:
-
Fuel quantity and quality
-
Oil level
-
Tires, brakes, controls
-
Airworthiness Certificate & Registration
-
Flight control movement
🧠 Even if your instructor flies with you, you are responsible for the pre-flight. Own it.
Pre-Flight vs. Daily Inspection: What’s the Difference?
Often used interchangeably, here’s a quick distinction:
| Term | Who Uses It | Scope |
|---|---|---|
| Pre-Flight Inspection | Pilots (FAA term) | Safety & readiness check before every flight |
| Daily Aircraft Inspection | Schools/Clubs | General condition check, sometimes by ground crew |
Most student pilots perform both at once—especially during flight training.
Student Pilot Daily Aircraft Inspection Checklist
Here’s a complete walkaround checklist broken down into phases, designed for a Cessna 172-style trainer.
You can adapt it to Piper or Diamond aircraft by referencing your POH.
🔍 Phase 1: Cockpit & Documentation
-
Remove control locks
-
Master switch ON
-
Check fuel gauges
-
Turn on flaps (extend full)
-
Exterior lights check (nav, strobe, landing)
-
Pitot heat ON (feel for warmth)
-
Check hobbs/tachometer readings
-
Master switch OFF
-
Check:
-
Airworthiness Certificate
-
Registration
-
Weight & Balance
-
POH (check onboard)
-
🔍 Phase 2: Left Wing
-
Remove tie-down
-
Check:
-
Wingtip, nav light, strobe light
-
Aileron movement (free & secure)
-
Flap condition and hinge pins
-
-
Fuel tank cap secure
-
Fuel sample (check for water/sediment)
-
Check leading edge for dents or bird strikes
-
Tire: inflation, tread, no bulges
-
Brake pad thickness and fluid leaks
🔍 Phase 3: Nose & Engine
-
Propeller: nicks, cracks, secure
-
Spinner secure
-
Check oil level (typically 6–8 quarts)
-
Inspect for oil leaks
-
Air filter clear
-
Check cowling fasteners
-
Nose wheel: strut inflation, tire condition
-
Check fuel strainer (sample drain)
🔍 Phase 4: Right Wing
-
Repeat same checks as left wing
-
Check stall warning opening (blow gently to hear buzzer)
-
Fuel cap secure
-
Fuel sample drawn from sump
-
Wingtip and light lens secure
🔍 Phase 5: Empennage (Tail Section)
-
Horizontal stabilizer & elevator: secure, move freely
-
Rudder movement (left/right travel)
-
Control cables secure
-
Rear tie-down removed
-
Antennas undamaged
Final Walkaround
-
Remove all covers, plugs, tie-downs, chocks
-
Verify flaps full range and retracted
-
Check fuel levels in both tanks
-
Final look for leaking fluids, loose screws, missing rivets
-
Clear area around aircraft before startup
🧰 Pro Tip: Use a Gleim or ASA laminated checklist to avoid forgetting any steps. Or download our printable version.
Tips for Effective Inspections
-
Take your time – 10–15 minutes is normal
-
Touch every control surface – don’t just eyeball
-
Use a flashlight – especially under wings and in wheel wells
-
Do it the same way every time – consistency builds memory
-
Ask questions – use instructors as resources
-
Log any discrepancies – tell your instructor or school immediately
🔎 Even a loose screw or chafed wire can ground a plane—stay alert.
Common Issues to Watch For
| Issue | What to Check |
|---|---|
| Fuel contamination | Drain samples from each sump |
| Low tire pressure | Use a tire pressure gauge if needed |
| Oil leaks | Look under cowling and belly |
| Bird nests | Common near engine intake or in wheel wells |
| Frayed control cables | Especially near pulleys |
| Cracked lights or lenses | Affects visibility and legality |
| Worn brake pads | Listen for brake squeal or soft pedal feel |
Best Gear for Student Pilots (Inspection Tools)
Add these to your flight bag for better, safer inspections:
🧰 ASA Preflight Tool Kit
Includes fuel tester, flashlight, mirror, and tire gauge.
🧪 GATS Jar Fuel Tester
Best tool for checking fuel color and safely dumping water-contaminated fuel.
🔦 Coast PX20 Dual Color Flashlight
Red + white light, perfect for early morning or night pre-flights.
Video Tutorial & Printable Version
🎥 Coming soon: A full walkthrough video showing every inspection step on a real Cessna 172.
📄 For now, get our FREE printable student pilot pre-flight checklist (PDF), optimized for kneeboard use.
Final Thoughts
Daily aircraft inspections are not optional—they’re your first defense against failure in the sky. As a student pilot, mastering this habit not only keeps you safe but makes you a better aviator in the eyes of your examiner, instructor, and fellow pilots.
👉 Ready to take it further? Download your own customized pre-flight checklist or explore our checkride prep guide for systems knowledge you’ll actually need.
